
Packing Architectural Metalwork: Protection, Crating and Site Delivery
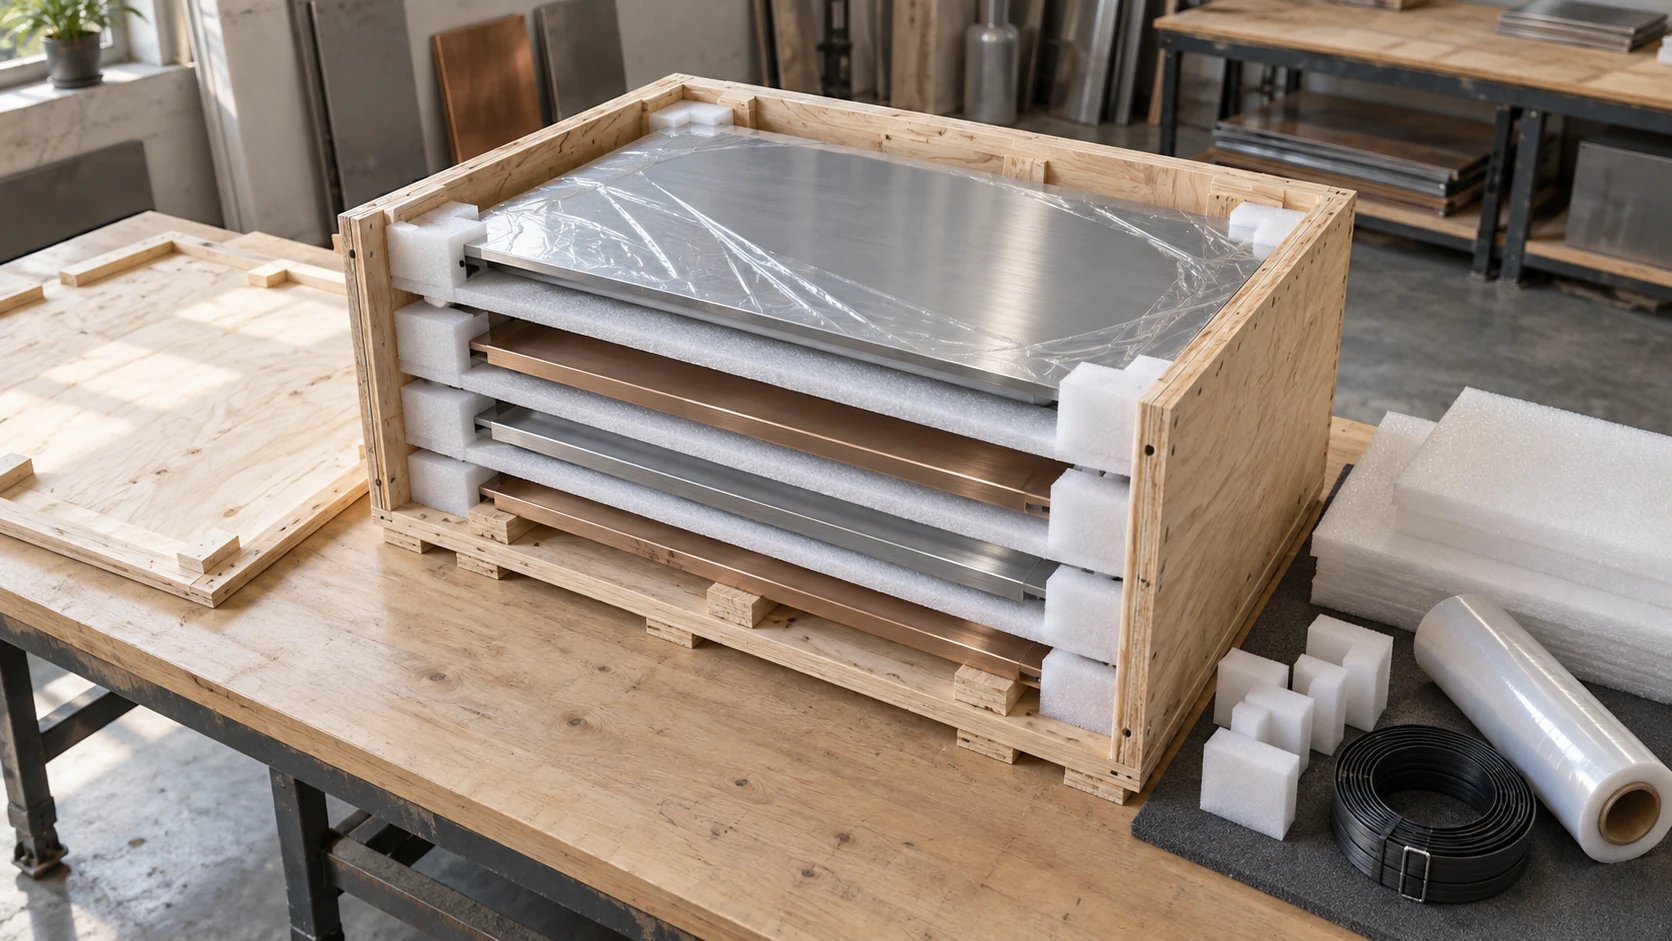
Architectural metalwork is often judged by its surface, edges and relationship to the surrounding space. Packing deserves the same attention. A finished panel, a long trim or an irregular decorative element needs protection that considers its form, finish, supports and journey to site.
This guide follows the packing conversation from the intended setting through materials, preparation, crating, inspection and arrival. It brings together examples for retail interiors, residences and hospitality projects, while keeping the actual packing specification tied to the individual shipment.
All images are illustrative; materials, dimensions, support arrangements and handling instructions must be confirmed in the approved project packing plan.
Match the Packing to the Setting
Luxury retail interiors
Mirror finishes, decorative panels and irregular forms make surface protection a central consideration in retail interiors. Start by identifying the visible faces and the areas most exposed during handling. Discuss a protective film or soft contact layer compatible with the actual finish, rather than selecting protection by appearance alone.
A supported crate can help organize larger elements, but its orientation and internal arrangement need to suit the contents and handling method. Define how each piece is separated, where it is supported and how it will be removed at site. Connect the package identification to the agreed installation location.

Residential interiors
Skirting, door surrounds and wall trims bring a different organizational challenge: numerous lengths and small variations may need to reach specific rooms. Grouping pieces by the agreed installation sequence can make the packing list easier to follow.
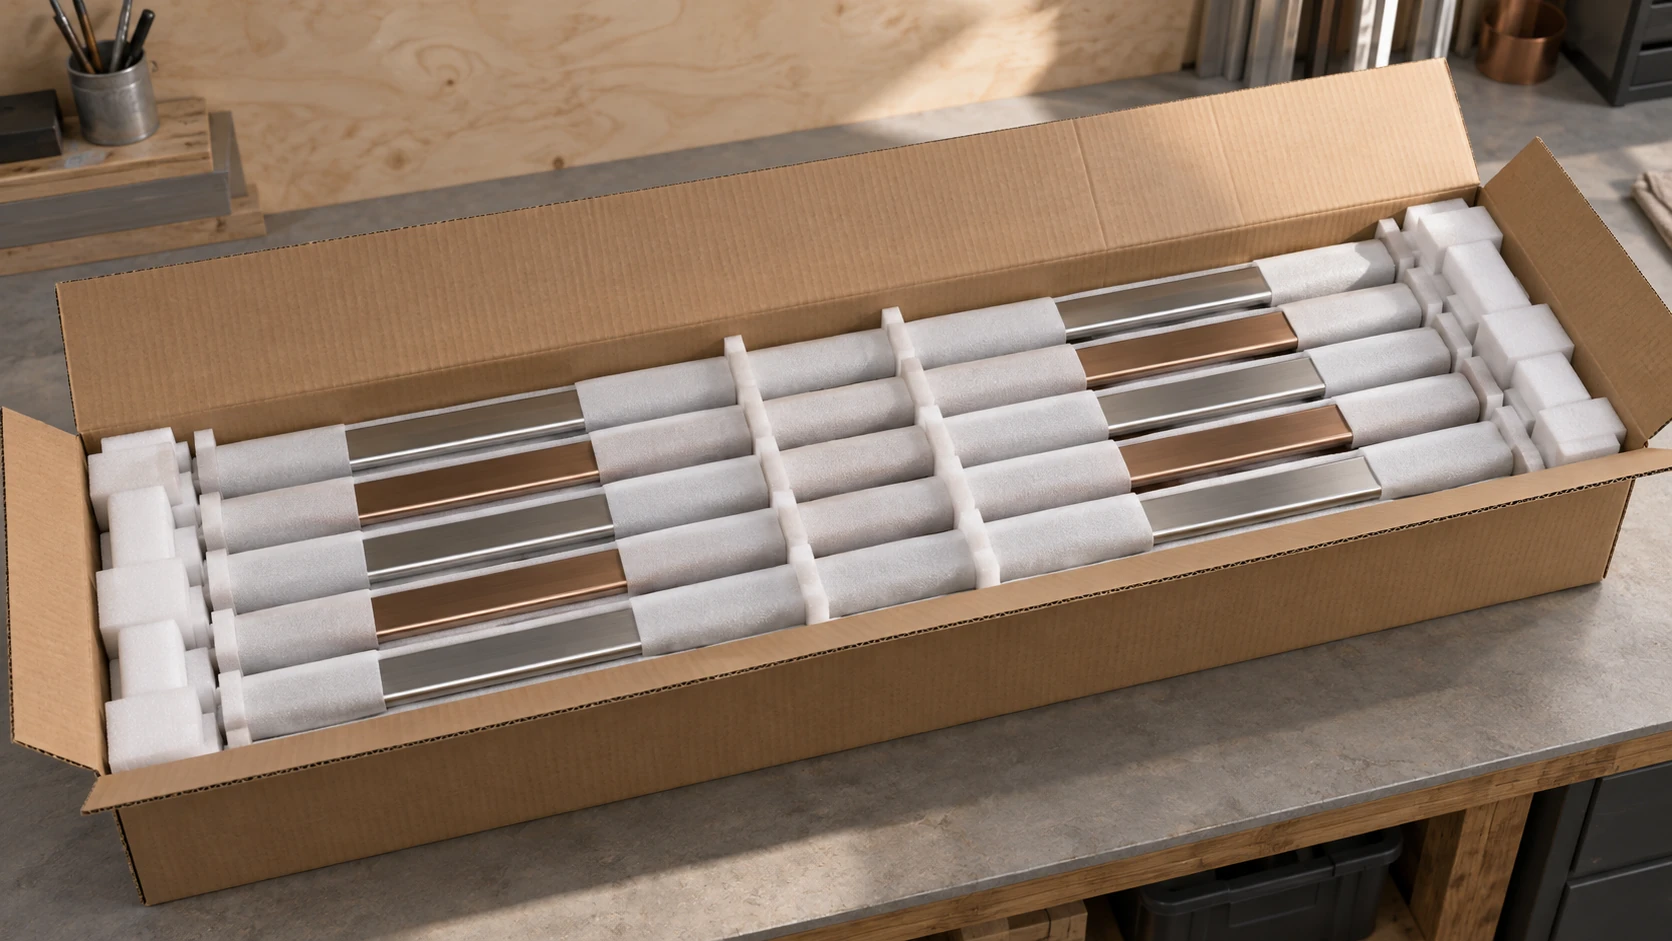
A carton may be appropriate for selected components when its construction, cushioning and support suit the contents. Protect long pieces against movement and contact with one another. Include visible package references and a packing list so the receiving team can identify the contents before opening. Discuss access, storage space and unpacking arrangements early.
Hospitality projects
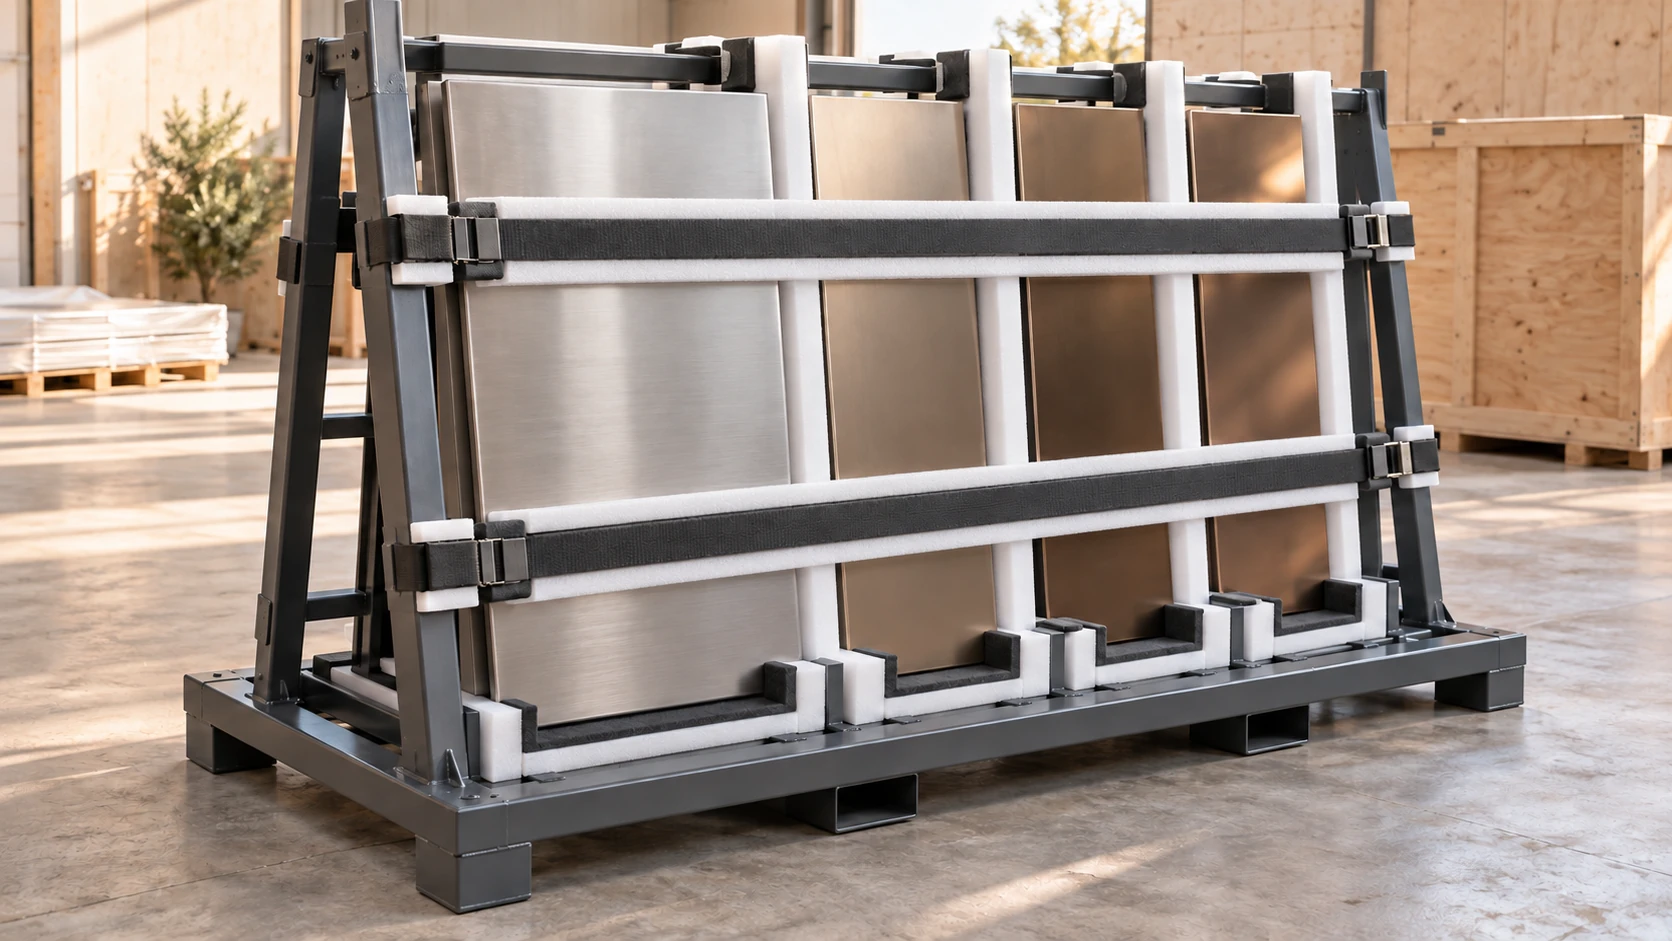
Hospitality projects may involve repeated elements distributed across floors or zones. Packing discussions should connect batch organization with the requirements of each piece. A reusable transport frame is one possible arrangement, alongside crates or cartons selected for the actual contents.
Specify cushioning at contact points and a clear method of restraint. Any proposed stacking arrangement needs confirmation for the frame, load and transport conditions; it should not be assumed from the packaging type. Package references can identify the intended floor, area and installation position without implying a particular tracking platform.
Build the Protection Layers
Surface protection
PE protective film, static-cling film and non-woven fabric appear in different surface-protection arrangements. Their suitability depends on the finish, contact material and intended period of protection. Confirm the selected product with its supplier and the project requirements, including application and removal instructions.
When planning protection for mirror, brushed or PVD finishes, confirm the particular surface requirements rather than assuming a universal combination of layers. Film thickness, adhesion and retention period need confirmation for the material actually being used. Keep surfaces clean and dry before applying the agreed protection.
Cushioning and separation
EPE foam, EVA pads, bubble wrap, honeycomb paperboard and foam board can serve different roles in a package. Identify whether a material is being used as a contact layer, a separator, a shaped support or a filler. Those roles should be clear before quantities are selected.
Choose the thickness, coverage and arrangement to suit the element and the approved package design. For irregular pieces, discuss shaped supports that protect the form without leaving vulnerable portions unsupported. For multiple panels, provide separation between pieces and check that the arrangement remains in place during handling.
Structure and outer packaging
Crates, steel frames and corrugated cartons should be considered as part of the complete packing arrangement. Their dimensions, construction, supports, restraint points and handling provisions need to suit the contents and route.
Avoid assigning a universal capacity to a crate or frame. Likewise, a board thickness or steel-section size does not establish the performance of a completed package. Confirm the relevant construction details and handling instructions together. Select straps, closures and their contact protection for the approved arrangement.
Identification and moisture considerations
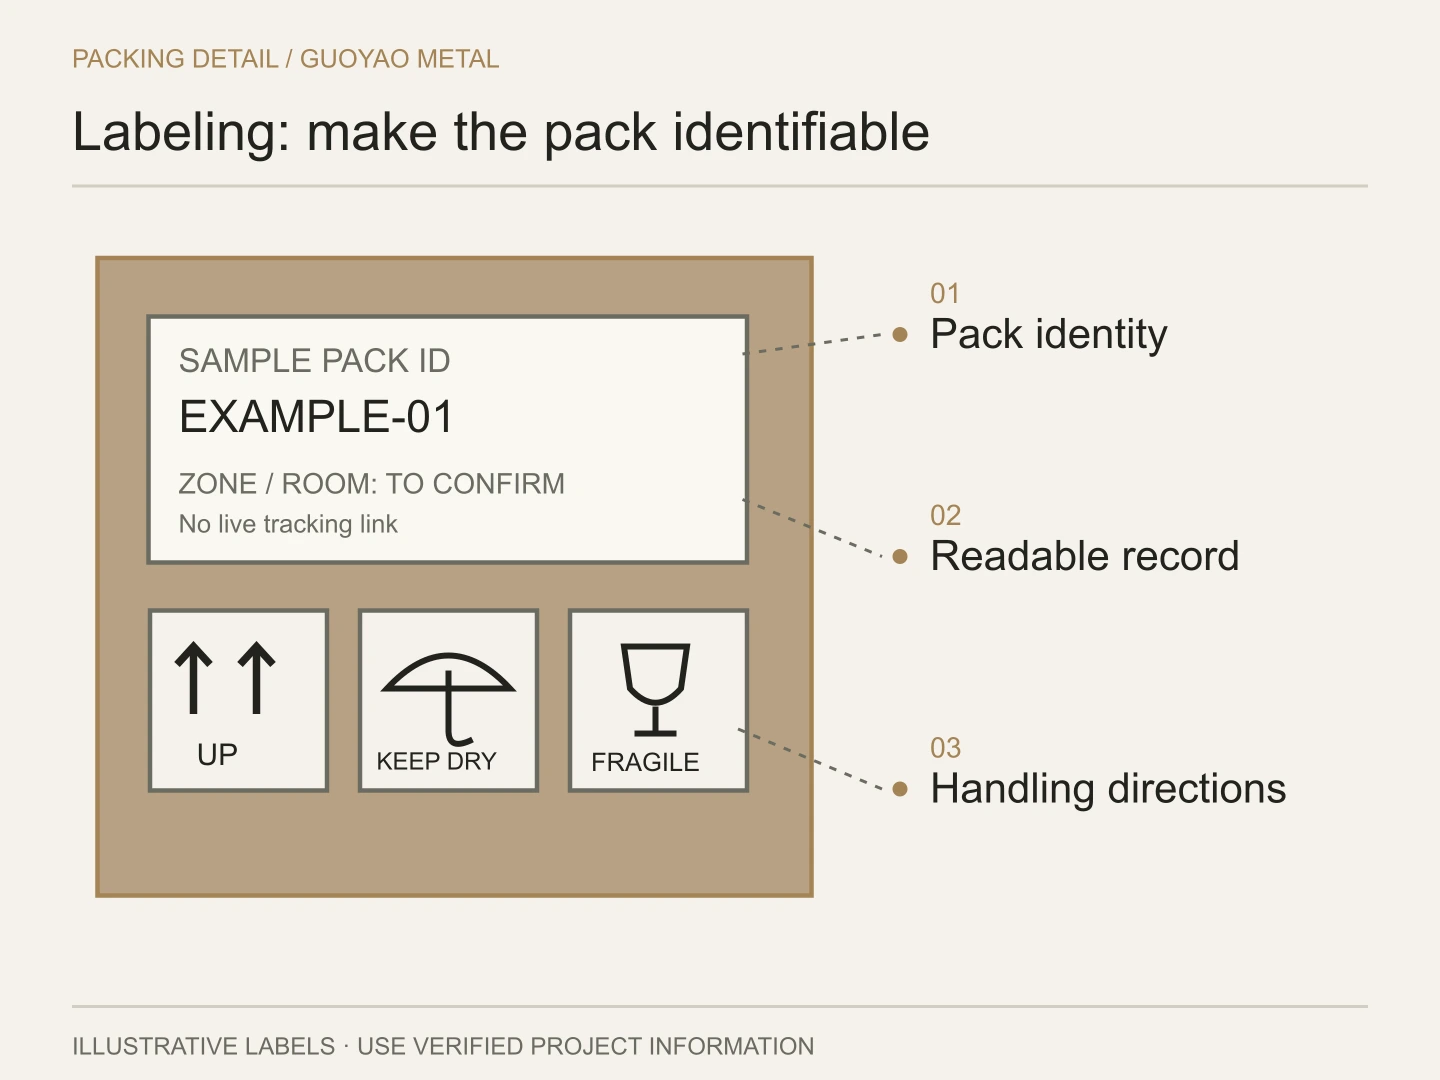
Prepare labels, packing lists and the agreed handling symbols before sealing. Package references should be readable and consistent with the shipment records. If a QR code is used, confirm what information it links to and include the essential reference in visible text.
Discuss exposure to rain, storage and moisture along the route. Where desiccants or other moisture-control materials are specified, their type and quantity need to follow the selected packing approach. A fixed number of bags is not a substitute for that decision.
Follow the 12-Step Checklist
1. Inspect and clean the finished pieces
Check the visible surfaces, edges and dimensions against the agreed drawings and acceptance requirements. Record issues before packing so their condition is clear. Use the cleaning method specified for the finish, remove loose dust or debris and allow the surface to dry. Packing should follow the agreed inspection outcome, rather than conceal unresolved surface concerns beneath protection.
2. Apply the agreed surface protection
Use the selected film or soft protection according to its application instructions. Work across the surface carefully and check edges, folds and trapped debris. Where an additional fabric layer is specified, confirm how it will be held in place. Record the relevant removal instructions and timing for the receiving team; avoid an assumed universal film-retention period.
3. Protect corners and exposed edges
Identify the corners, ends and long edges vulnerable during handling. Fit the specified corner or edge protection and confirm its coverage. Select its thickness and attachment method for the actual piece and package. Keep adhesive contact and removal requirements clear, including whether tapes may contact the protection layer or finish. Check that guards remain secure before proceeding.
4. Wrap and cushion the element
Apply cushioning in the arrangement agreed for the element. Check coverage around changes in shape and at the ends, rather than relying on a fixed number of wrapping layers. Set overlaps and attachments to maintain the protection during handling. For irregular forms, review the position of shaped supports and make sure the wrapping does not obscure unresolved support requirements.
5. Separate pieces within the package
When several pieces share a package, use the specified separators between them. Check their coverage, position and stability as each piece is introduced. The material and thickness should follow the approved arrangement; a single generic spacing value will not suit every combination. Identify any items that require individual compartments or protection against contact with adjacent pieces.
6. Place the contents in the outer packaging
Prepare the agreed base protection and position each piece according to the packing plan. Add the specified cushioning around the sides and top. Check that the contents are supported and the remaining spaces are addressed as designed. Orientation should follow the particular element, supports and handling instructions, rather than a blanket requirement for all panels to travel vertically.
7. Install supports and restraints
Fit the internal supports and restraints in their specified locations. Protect contact points where the plan requires it, and review support along long elements. Confirm that restraints hold the intended parts of the package without bearing directly on vulnerable faces. Check the arrangement before closing, while its position and condition can still be seen and recorded.
8. Close and secure the package
Close the crate or carton using the agreed fasteners or sealing method. Apply the specified straps and check their routing, contact protection and tension. The number, type and positioning of straps should follow the completed package design and equipment instructions. Inspect the outer packaging for damage introduced during closure, and keep the opening method clear for the receiving team.
9. Add identification and handling labels
Match the package reference to the packing list and installation information. Apply the agreed handling symbols in visible positions, with their orientation checked against the contents. Where digital identification is used, test the reference before dispatch and retain essential printed information. The aim is clear identification at each handover, whether the records are paper-based, digital or a combination.
10. Record weight, dimensions and condition
Measure the completed package and record its dimensions and weight for the shipment arrangements. Check these against the handling provisions established for the project. Photograph the packing stages and completed package as agreed, keeping the package reference visible. Do not substitute a generic maximum weight for the confirmed limits of the packaging, lifting equipment and transport arrangement.
11. Load in the agreed sequence
Prepare the loading area and place packages according to the transport plan. Consider the unloading sequence, access and permitted orientation. Use the agreed separation and restraint arrangements between packages and the vehicle. Check exposure to weather and the specified protection measures. Loading instructions should reflect the actual shipment, including any restrictions on stacking or changing a package's orientation.
12. Coordinate arrival and handover
Agree the communication and shipment-recording arrangements for the journey. At arrival, check the external packaging before opening and record visible damage or unexpected conditions. Follow the handling labels and agreed unloading method. Keep the package identification, arrival photographs and receiving record connected, so any concern can be discussed with the relevant parties before the contents are installed.
Resolve Six Packing Details
Vertical crate arrangement
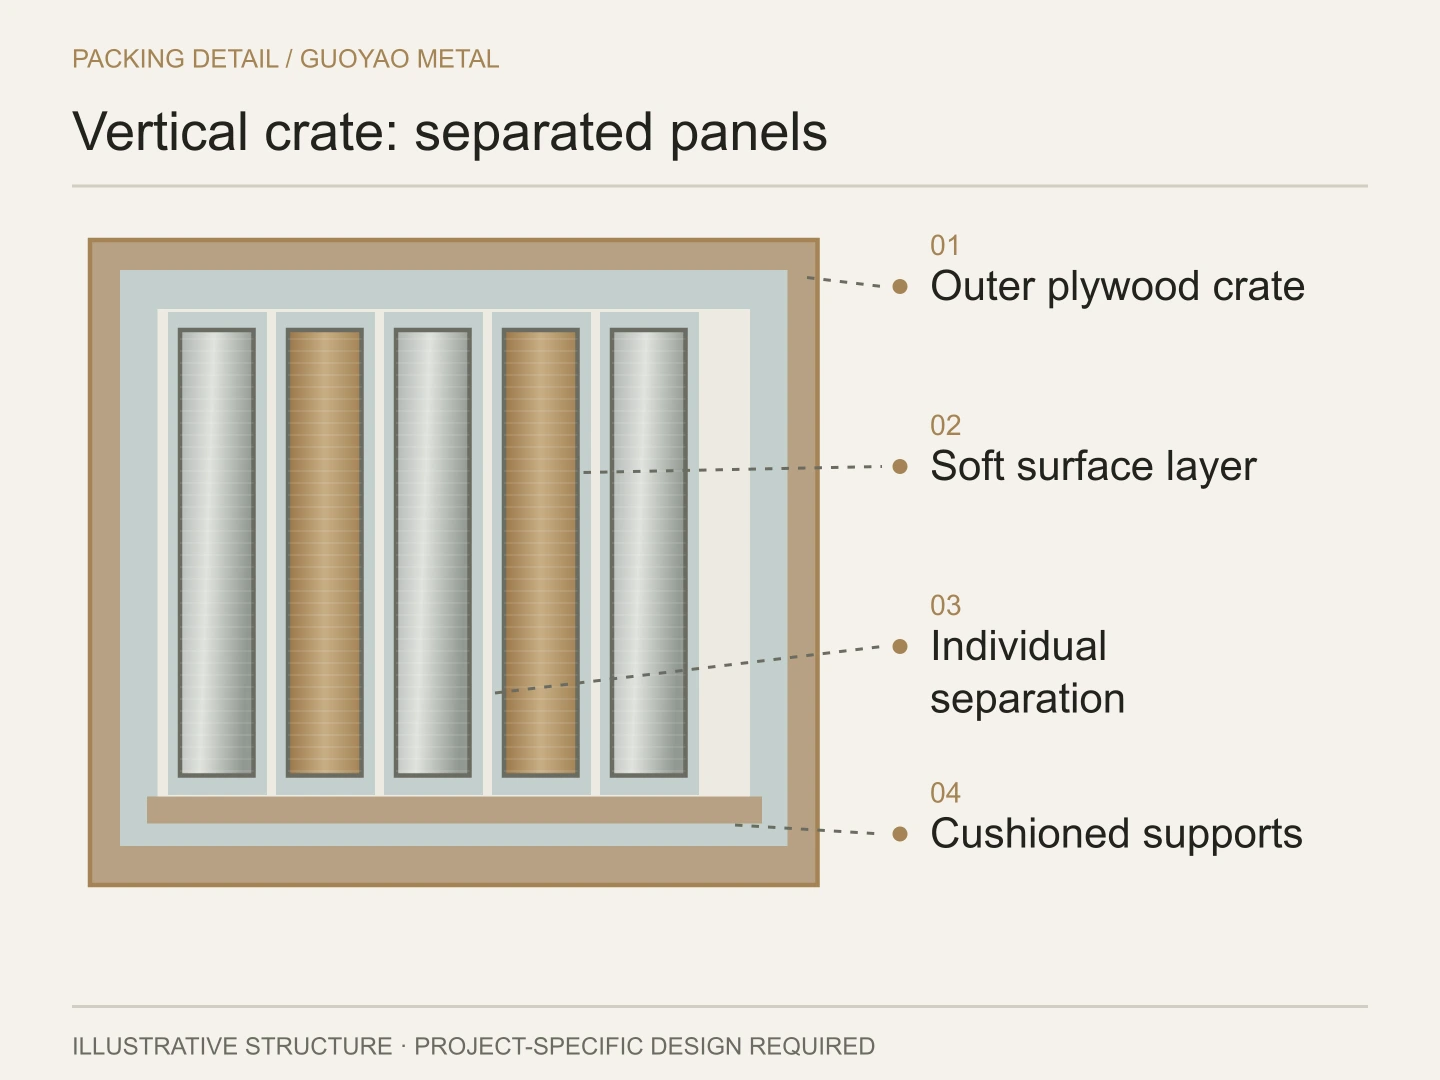
The illustrated crate shows panels separated and supported within an outer structure. Discuss the positioning of the base protection, side cushioning and internal supports together. Confirm the crate dimensions and construction for the actual contents and removal method. The drawing communicates an arrangement, rather than a tested capacity or prescribed material thickness.
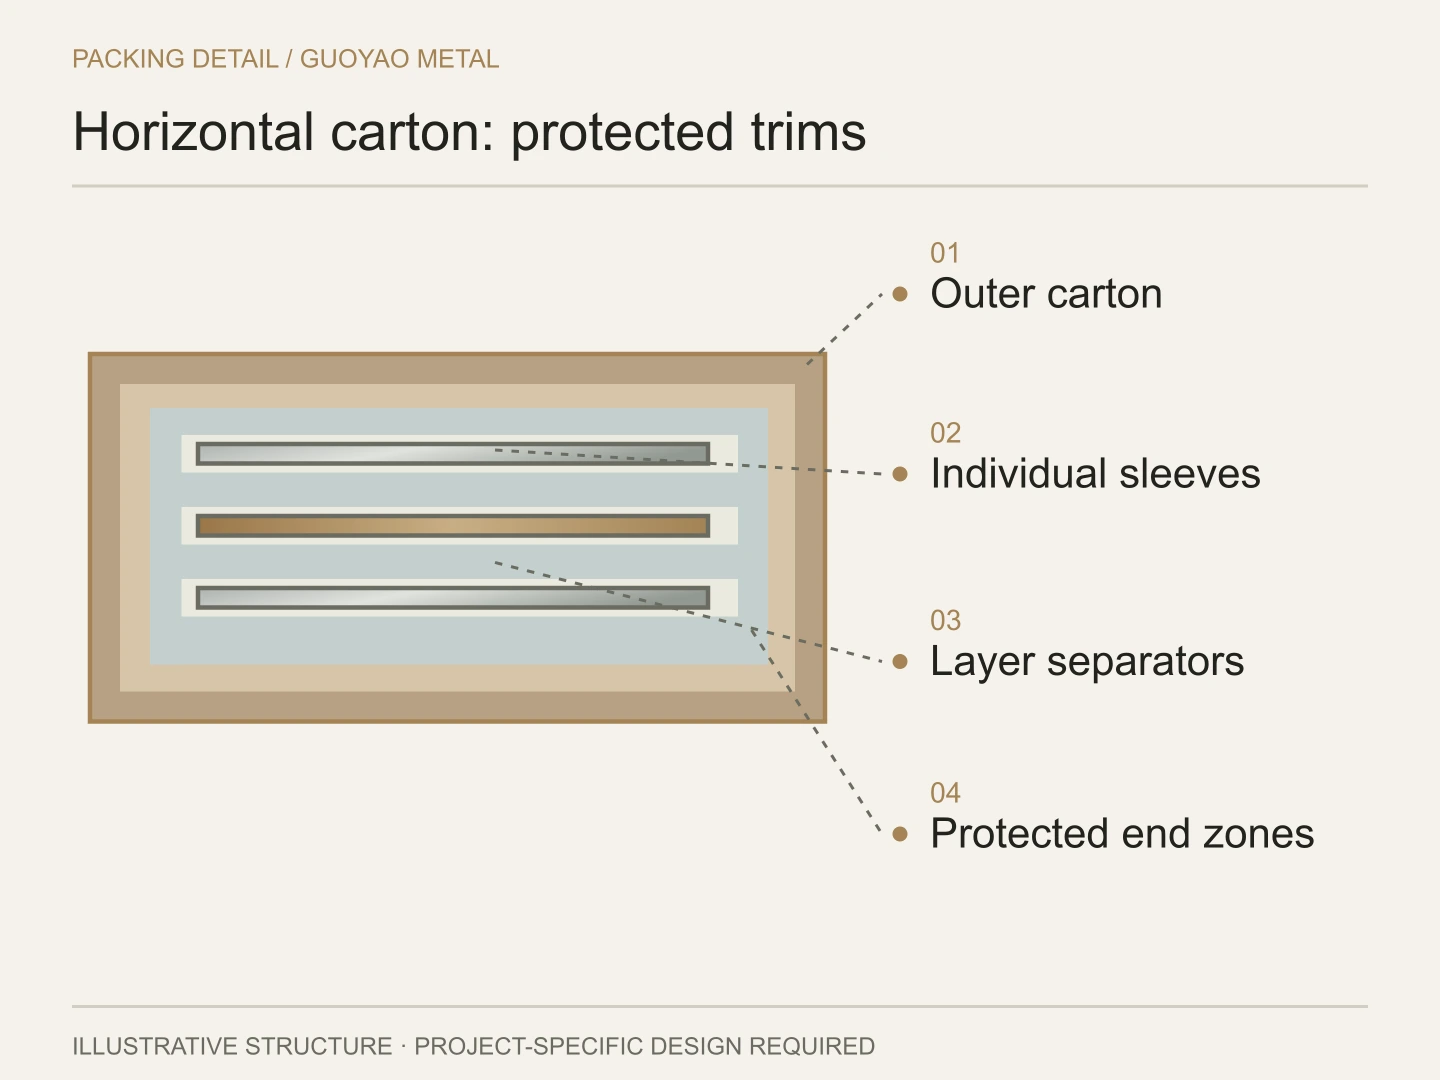
Horizontal carton arrangement
The carton example groups protected long components with separators between them. Review support along their length and how movement is restrained within the carton. Select the carton construction, cushioning and closure as one arrangement. Confirm the handling method from the complete package, without assuming that a carton is suitable for an individual person to lift.
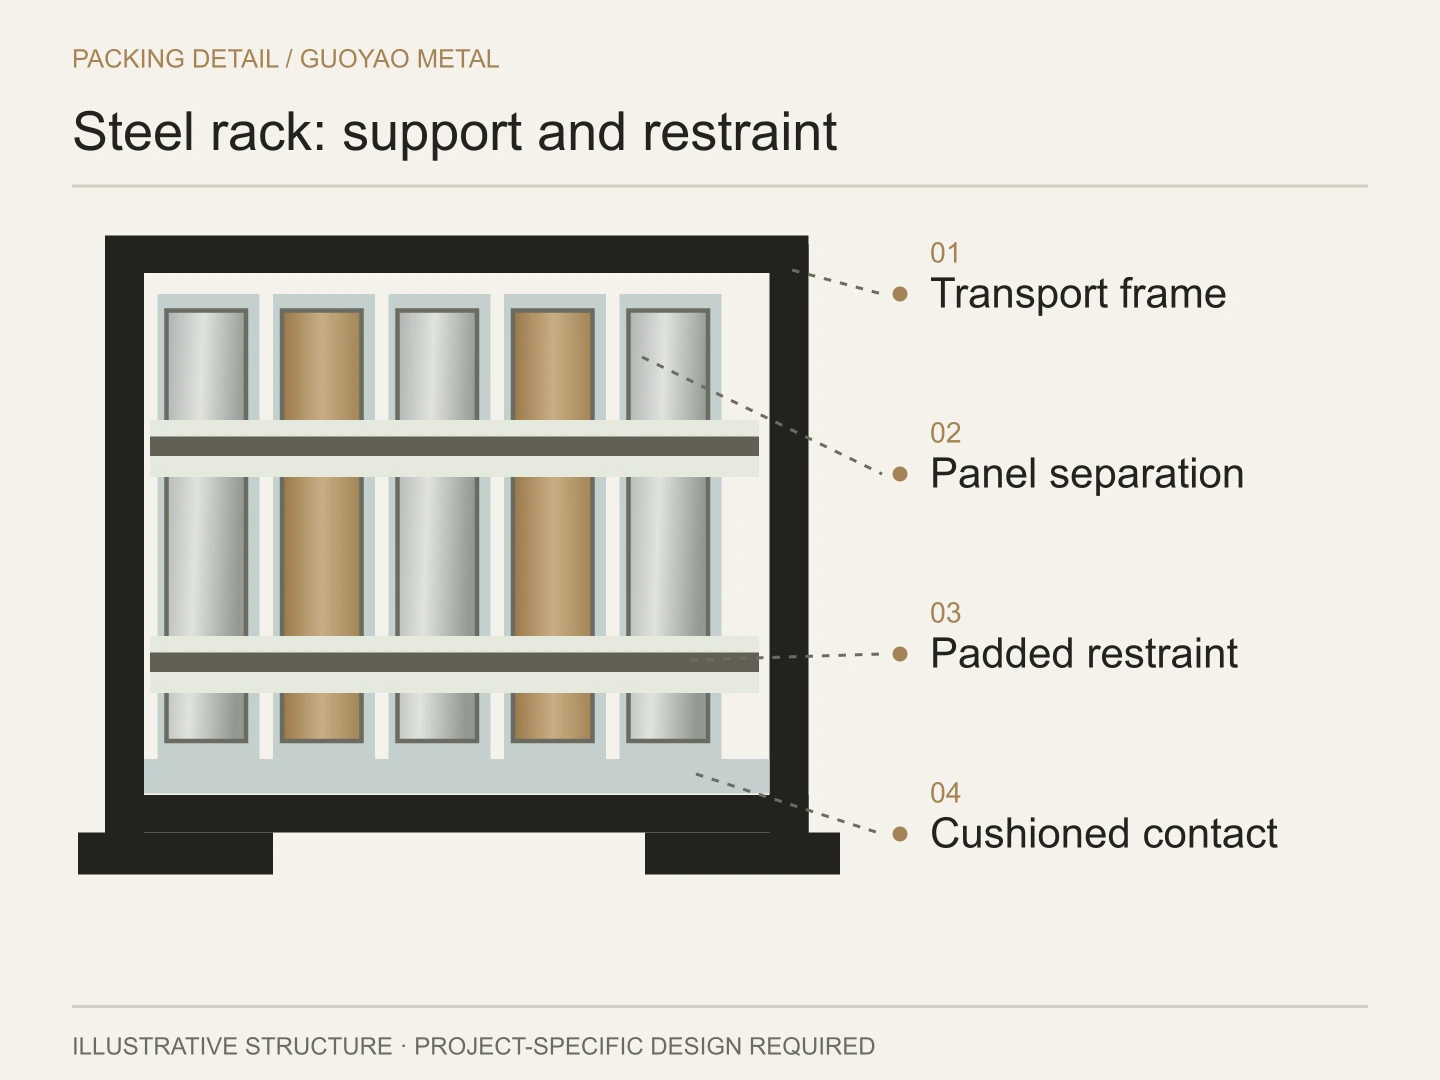
Steel transport frame
A frame example can illustrate how repeated panels are organized with cushioning at contact points. Its supports, restraints, handling provisions and any proposed reuse need to be agreed for the shipment. Stacking requires a confirmed arrangement; the presence of a steel frame alone does not establish a permissible stacking height.
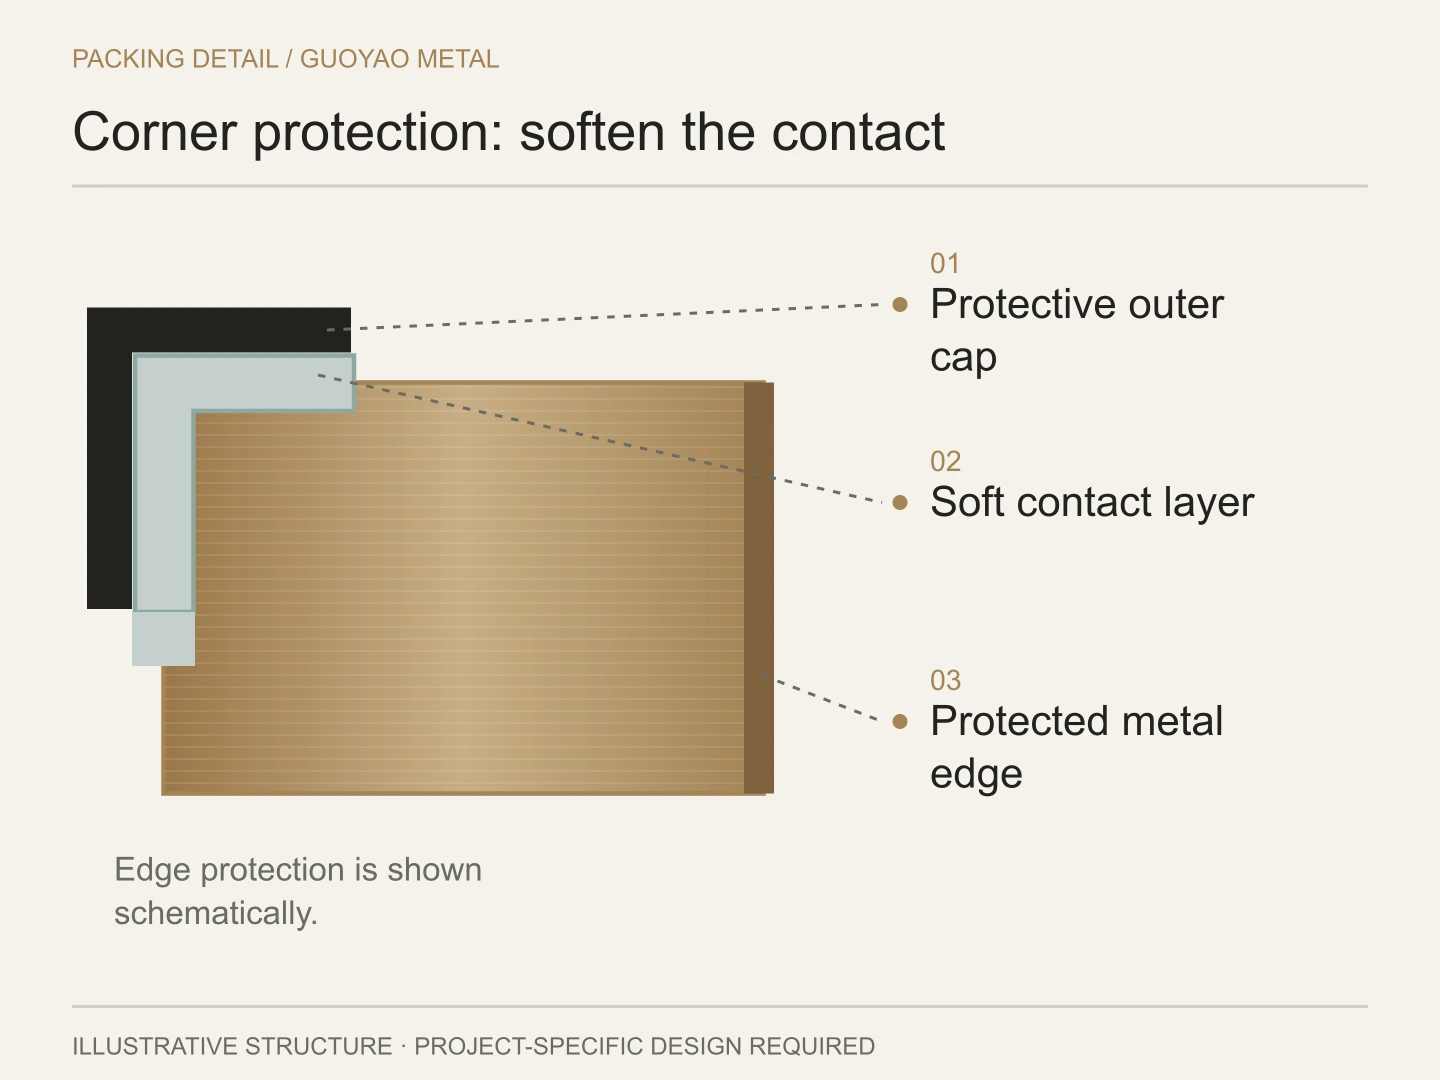
Corner and edge protection
Corner protection should cover the exposed parts identified in the packing review. Check how guards, soft pads and edge strips meet one another, and how they are retained. Their dimensions and attachment method need to suit the geometry and approved protection system. Confirm that the arrangement can be removed without unintended contact with the finished surface.
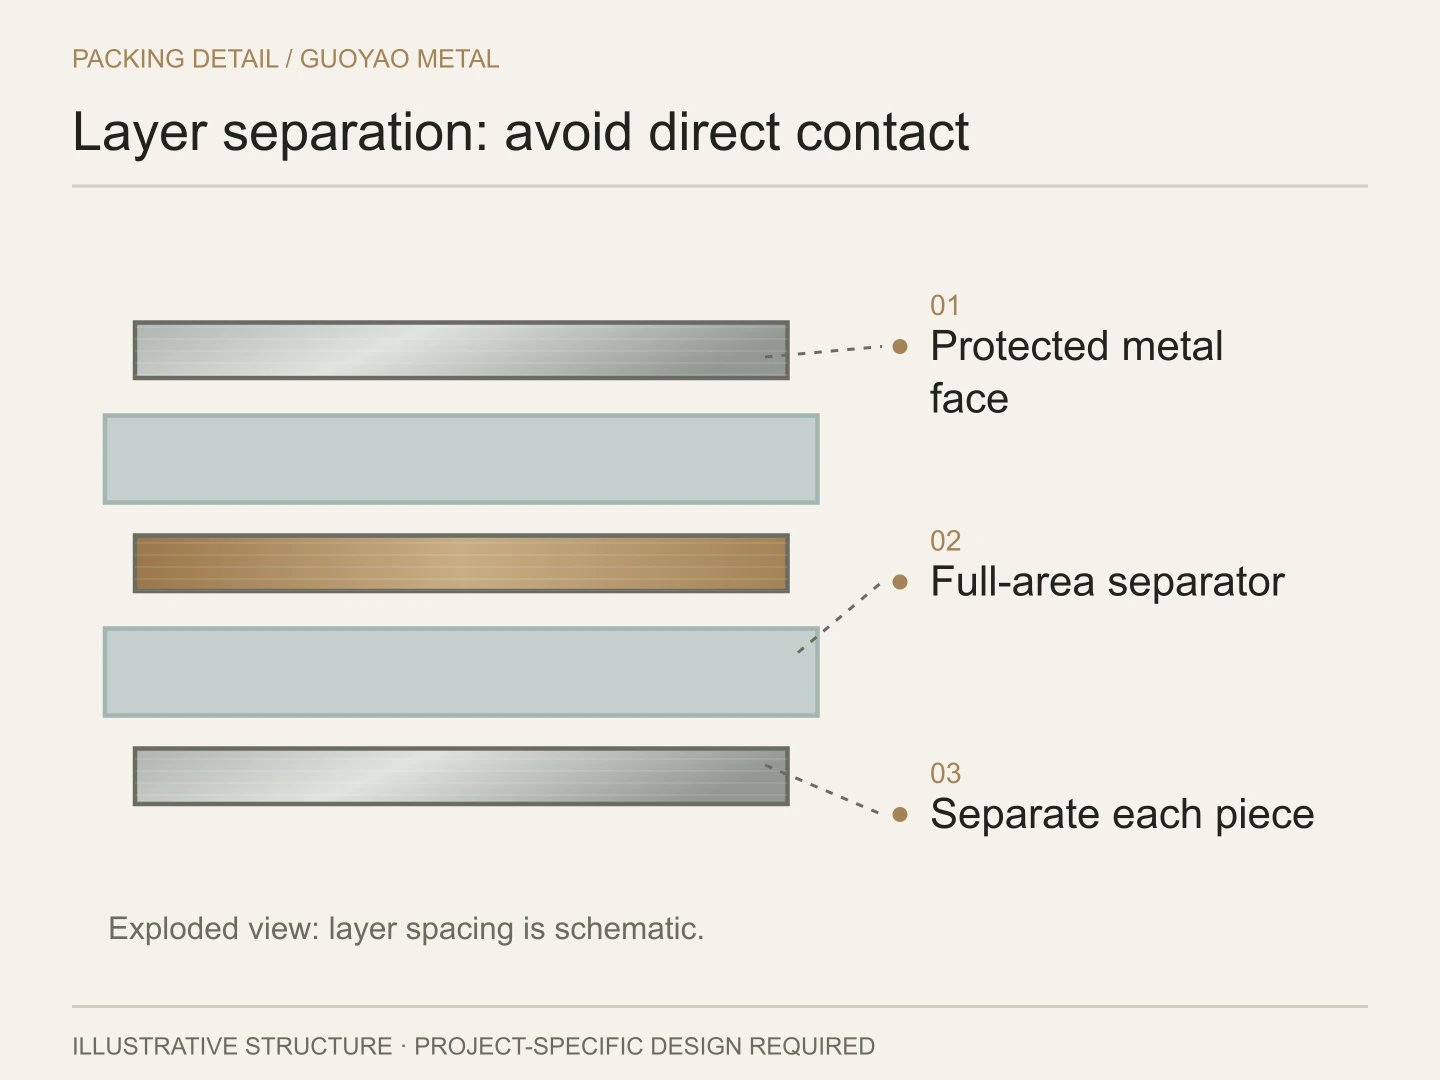
Separation between panels
The layered example highlights the need to keep neighboring pieces from contacting one another. Select separators that cover the intended areas and remain positioned within the package. Confirm the number and arrangement of pieces from the approved packing design, rather than using a fixed layer limit for every box.
Package identification
Bring the package reference, contents and handling instructions into one readable arrangement. Symbols should match the approved handling requirements. A sample label may show where a QR reference could appear, but it does not demonstrate a functioning traceability system. Keep essential identifiers on the packing list and in visible printed text.
Plan Cost and Risk
Discuss the cost drivers
Packing costs include outer packaging, surface protection, cushioning, supports, fasteners, labor and identification. Discuss these items against the actual contents and route. A large irregular element, several separated panels and a carton of small trims have different packing considerations.
Review the proposed materials and activities as a project scope, including loading, receiving and any agreed reuse of outer packaging. Keep material quantities, packing activities and handling requirements visible in that discussion, so the proposed arrangement can be assessed against the shipment itself.
Follow the possible damage pathways
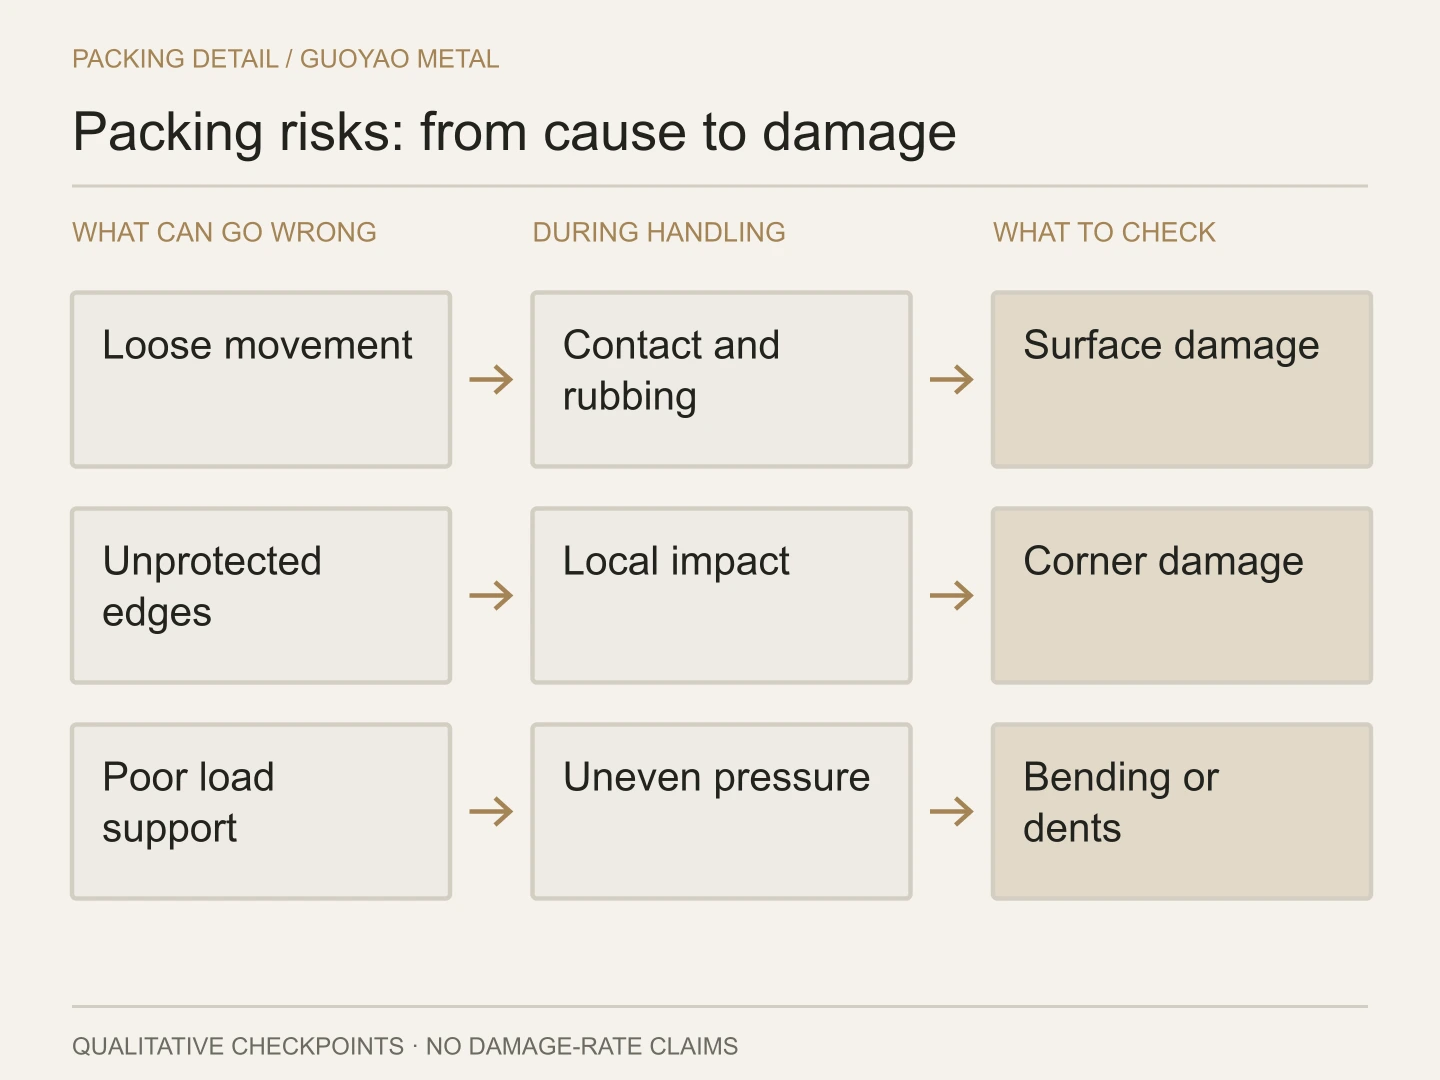
Consider how a problem could develop: movement may bring neighboring pieces into contact; exposed corners may be struck during handling; moisture may enter damaged protection; unclear labels may lead to inappropriate orientation. Review these pathways before deciding where protection is needed. The illustration below is a qualitative discussion aid, not a damage-rate comparison.
Agree the protection priorities
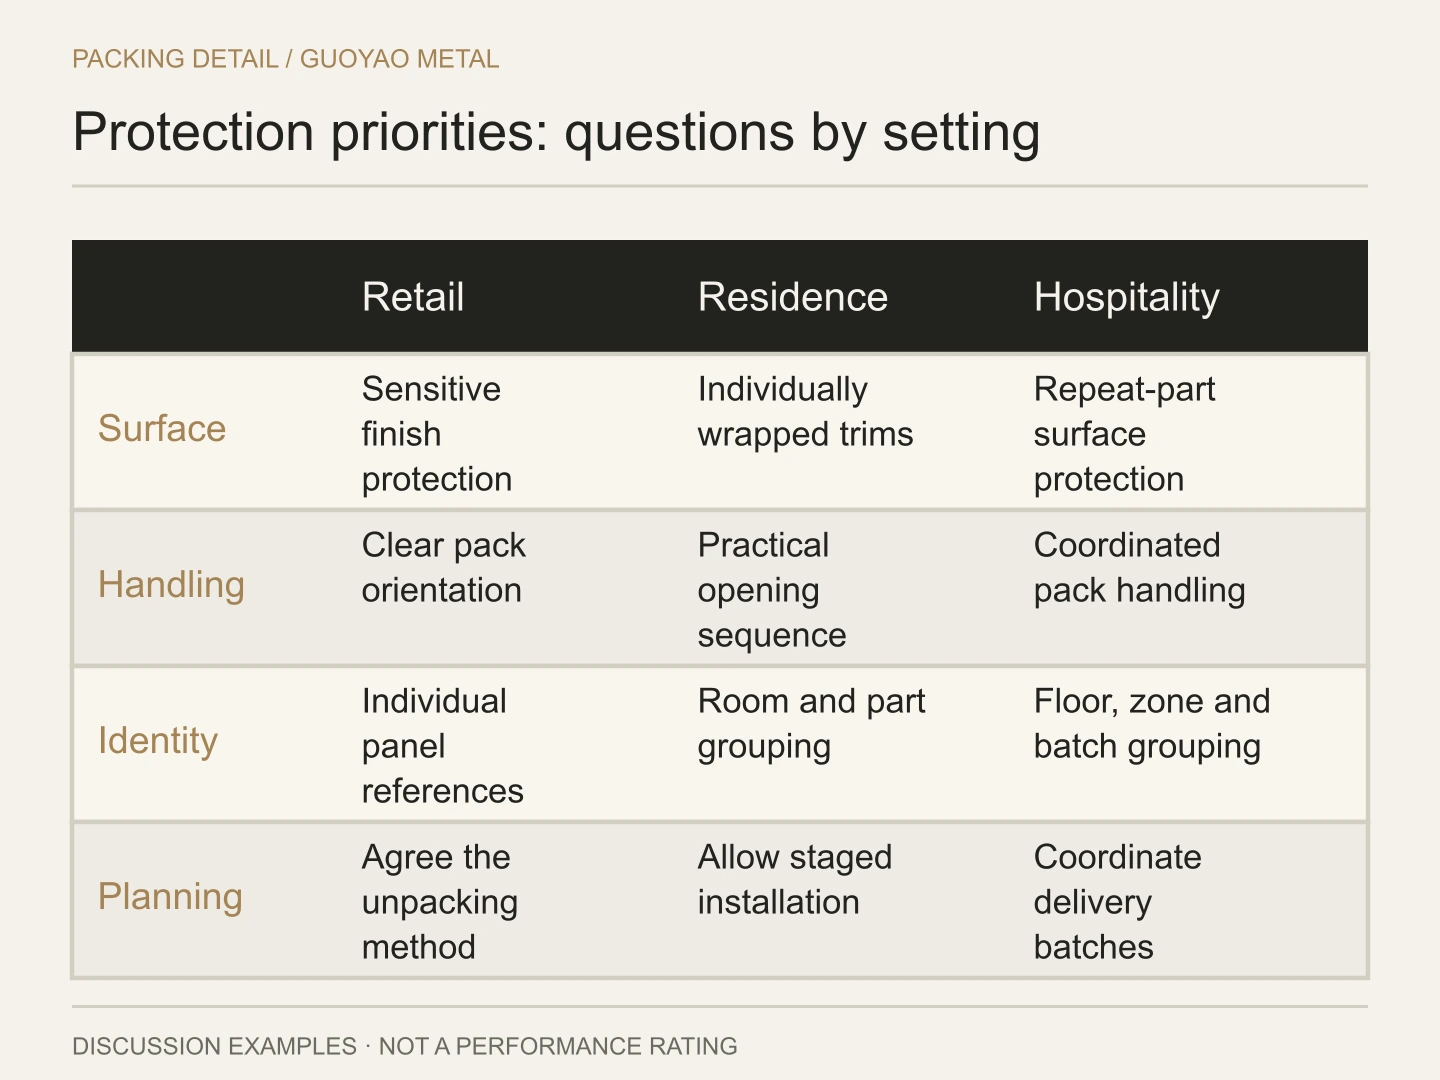
Review surface contact, corner coverage, cushioning, supports and identification together. The setting helps explain the priorities, but it does not define a universal protection score. A particular finish, shape or handling constraint may matter more than the broad project category.
Check Quality at Each Handover
Before packing
Review surfaces, edges, dimensions and cleanliness against the agreed acceptance requirements. Resolve or record any concern before it is covered. Confirm the protection materials and identify the visible faces, vulnerable areas and intended support positions.
During packing
Check protection coverage, corner guards, separators and support positions while they remain accessible. Review restraints and contact points before closing. Photographs can document the arrangement, but the inspection still needs to follow the agreed project checks.
After closure
Check the package condition, closures, straps and labels. Match the reference to the packing list and verify the recorded weight and dimensions. Where a digital reference is included, confirm that it provides the intended information.
At arrival
Record the external condition and check for signs of impact, moisture or disturbed restraints before unpacking. Follow the agreed opening method and note the condition of the contents. Keep records tied to the package reference so questions can be investigated without losing the shipment context.
Prevent Common Packing Damage
Surface scratches
Review direct contact between pieces, damaged protection and movement within the package. Check separators and contact layers before closure, and record the condition of visible faces before packing.
Corner damage
Check exposed ends and corners, the coverage of their guards and the intended handling method. Review possible contact between packages during loading and unloading rather than relying on a generic guard thickness.
Pressure marks and dents
Consider where supports, restraints or neighboring loads could concentrate pressure. Review the permitted loading and stacking arrangements for the package. Do not treat additional wrapping as a substitute for agreed structural support.
Bending or deformation
Review support along long components and at changes in shape. Confirm their orientation and restraint method for transport. The relevant support positions should come from the element and packing arrangement, not a universal rule.
Moisture damage
Check that surfaces are dry before protection is applied and review exposure during storage and transport. Inspect outer protection for damage and confirm any specified moisture-control measures for the journey.
Film residue
Confirm compatibility, application and removal instructions for the selected protection product. Keep its intended retention period visible to the receiving team. A single removal deadline cannot be assumed for every film and finish.
Lost or unreadable labels
Check label attachment and visibility before dispatch. Repeat essential package references in the packing list. Discuss how important information will remain available if a label is damaged or a digital reference cannot be read.
Damage during unpacking
Provide the agreed opening method and review where tools could contact the contents. Keep protective layers in place until the relevant handling stage, following the project instructions and the selected material's removal requirements.
Strap marks
Review strap routing, contact pads and tension against the specified arrangement. Protect vulnerable contact areas. Inspect the package after strapping rather than assuming that the strap material itself prevents surface damage.
Damaged crates or cartons
Check the outer structure, closures and fastening points before dispatch. Record visible concerns and review contact between packages during loading. Confirm the packaging construction for the actual contents and handling method.
Moisture beneath protection
Review the condition of the surface and protection layers, including their edges. Check the shipment's weather protection and inspect unexpected moisture at arrival. Avoid sealing a known moisture concern beneath a protective layer.
Failed digital references
If a QR reference is used, check its readability and linked information before dispatch. Retain the essential package identifier and contents information in ordinary text, so identification does not depend entirely on a scan.
Prepare the Tools
Organize the tools and consumables around the approved packing method, using the following functions as a checklist:
- Cleaning: the finish-approved cleaner, suitable cloths and the agreed means of removing loose dust.
- Surface protection: the selected film, fabric and application tools.
- Cushioning: specified foam, pads, bubble wrap, paperboard and shaped supports.
- Corners and edges: guards, edge strips and compatible attachment materials.
- Structure: the approved crate, frame or carton, internal supports and fasteners.
- Strapping and closure: the selected straps, closures, tools and contact protection.
- Identification: labels, packing lists and printing or scanning equipment where required.
- Inspection and records: measuring tools, weighing equipment and a camera or other agreed recording method.
- Moisture protection: the materials specified for the route and storage conditions.
Confirm quantities, availability and equipment instructions before work starts. Where a tool or protective material contacts a finished face, include that contact in the packing review.
Control the Working Environment
Arrange a suitable packing area
Review cleanliness, dryness, lighting, storage and clear access for the actual operation. Organize protected pieces so they do not contact tools or loose materials. Confirm any environmental limits and access requirements against the relevant materials, work arrangements and site rules.
Agree handling and safety arrangements
Cutting, strapping and moving packages require equipment instructions, suitable protective equipment and the site's handling procedures. Confirm how the completed packages will be moved and received. Do not infer a safe lifting method from a generic package weight, or assume that adding another person resolves a handling concern.
Plan packaging recovery
Discuss which crates, frames or other materials can be returned or reused under the project arrangements. Separate waste streams as required and confirm the locally accepted routes for cartons, films, foams and desiccants. Recyclability depends on the selected material and available processing route; it should not be assumed for every item.
The packing plan should connect protection, identification and handling from preparation to arrival. Clear project requirements and readable records make that conversation more useful than unsupported performance figures or a universal packing specification.